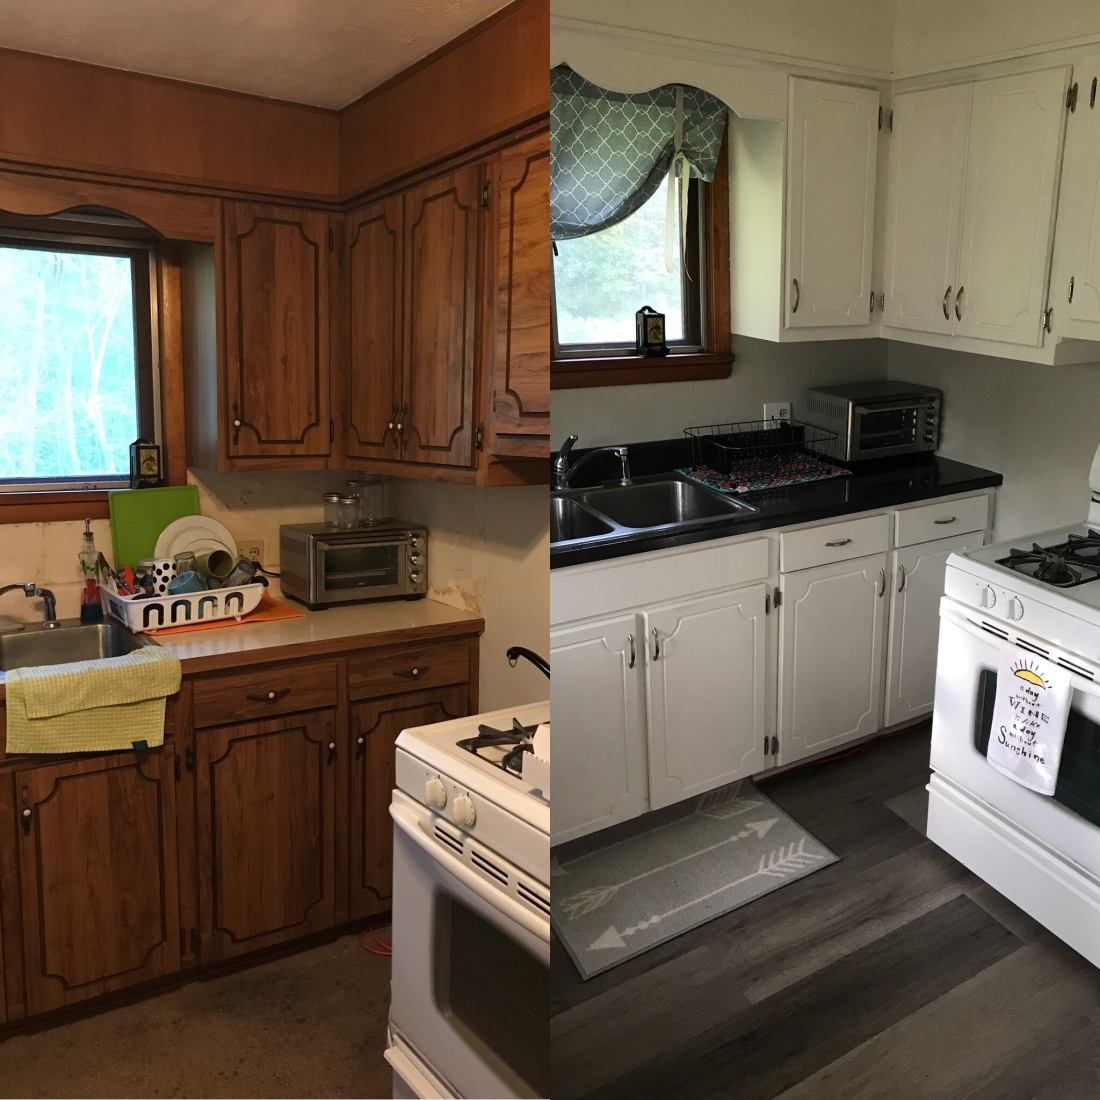
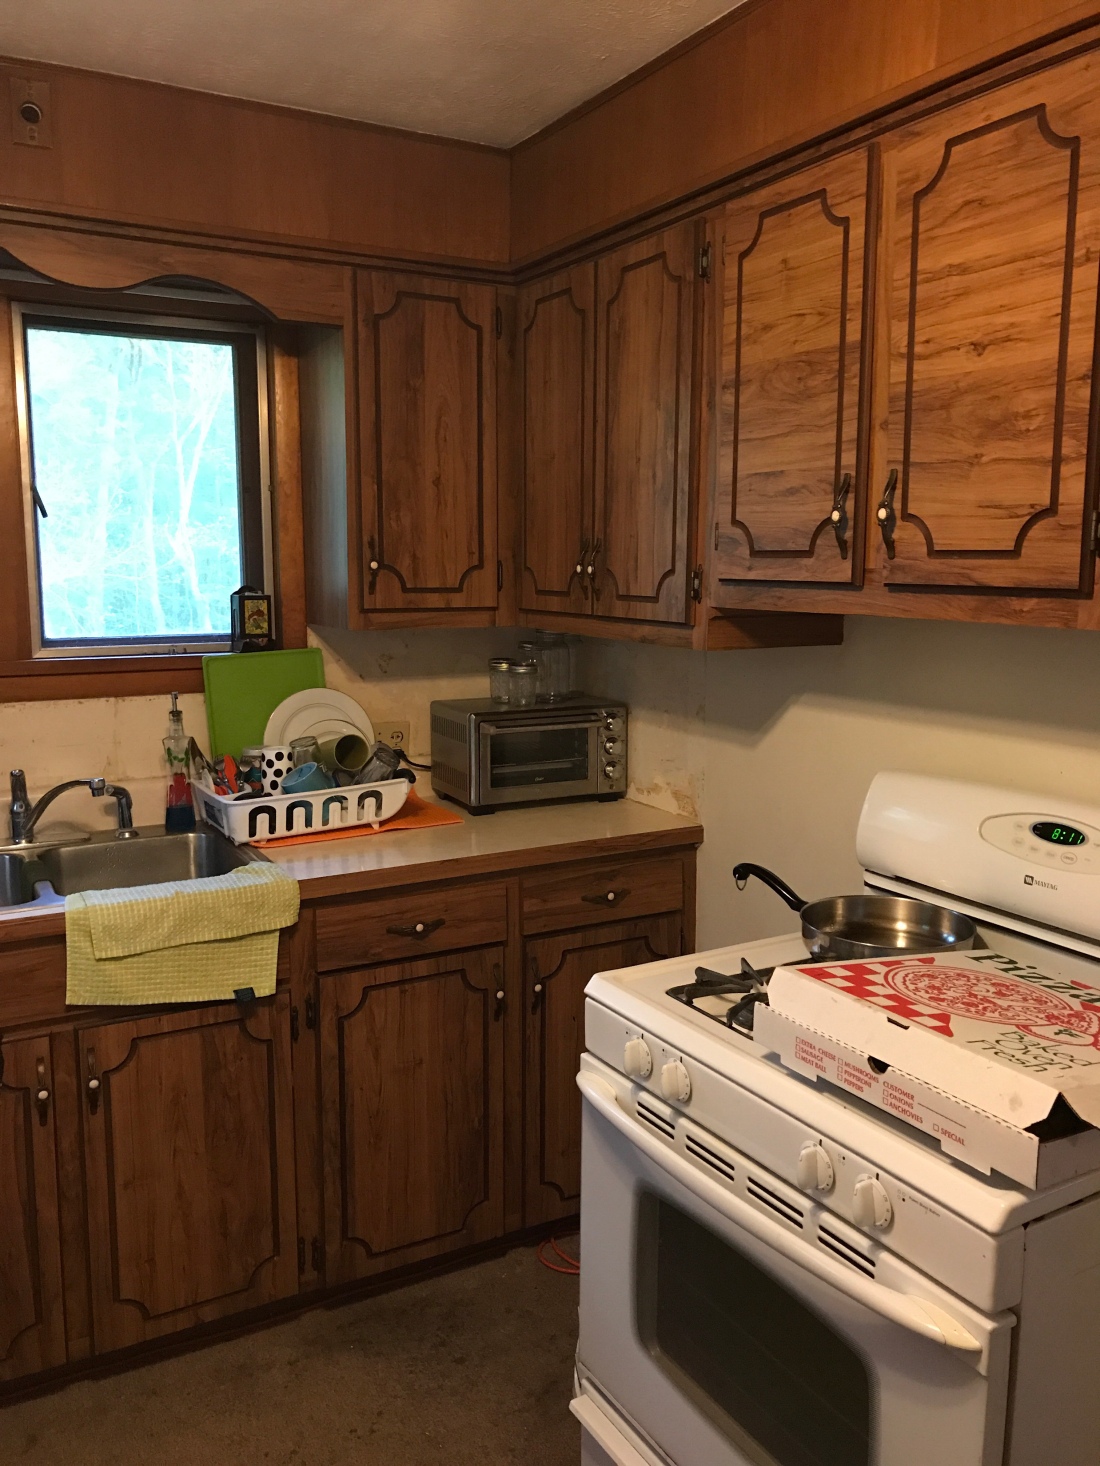
 You read it right. I spray painted the kitchen counters. When I moved in with my boyfriend, I moved into a total bachelor pad. This place was messy with man stuff everywhere. We cleaned up, found homes for all of his treasures he couldn’t part with and eventually found the kitchen in that mess. I thought okay, I can at least cook dinner in here and make my coffee, but that’s about it. It was outdated, the refrigerator blocked the window, and worst of all, was half carpeted (the other half was bare subfloor because the carpet had been ripped up). I lived with it for a few months before deciding I was going to overhaul the whole kitchen. Since I was still a new resident, I told him I was thinking of painting in there and he said what he usually does “I don’t give a f***, do whatever you want.” Okay, just the answer I was hoping for.
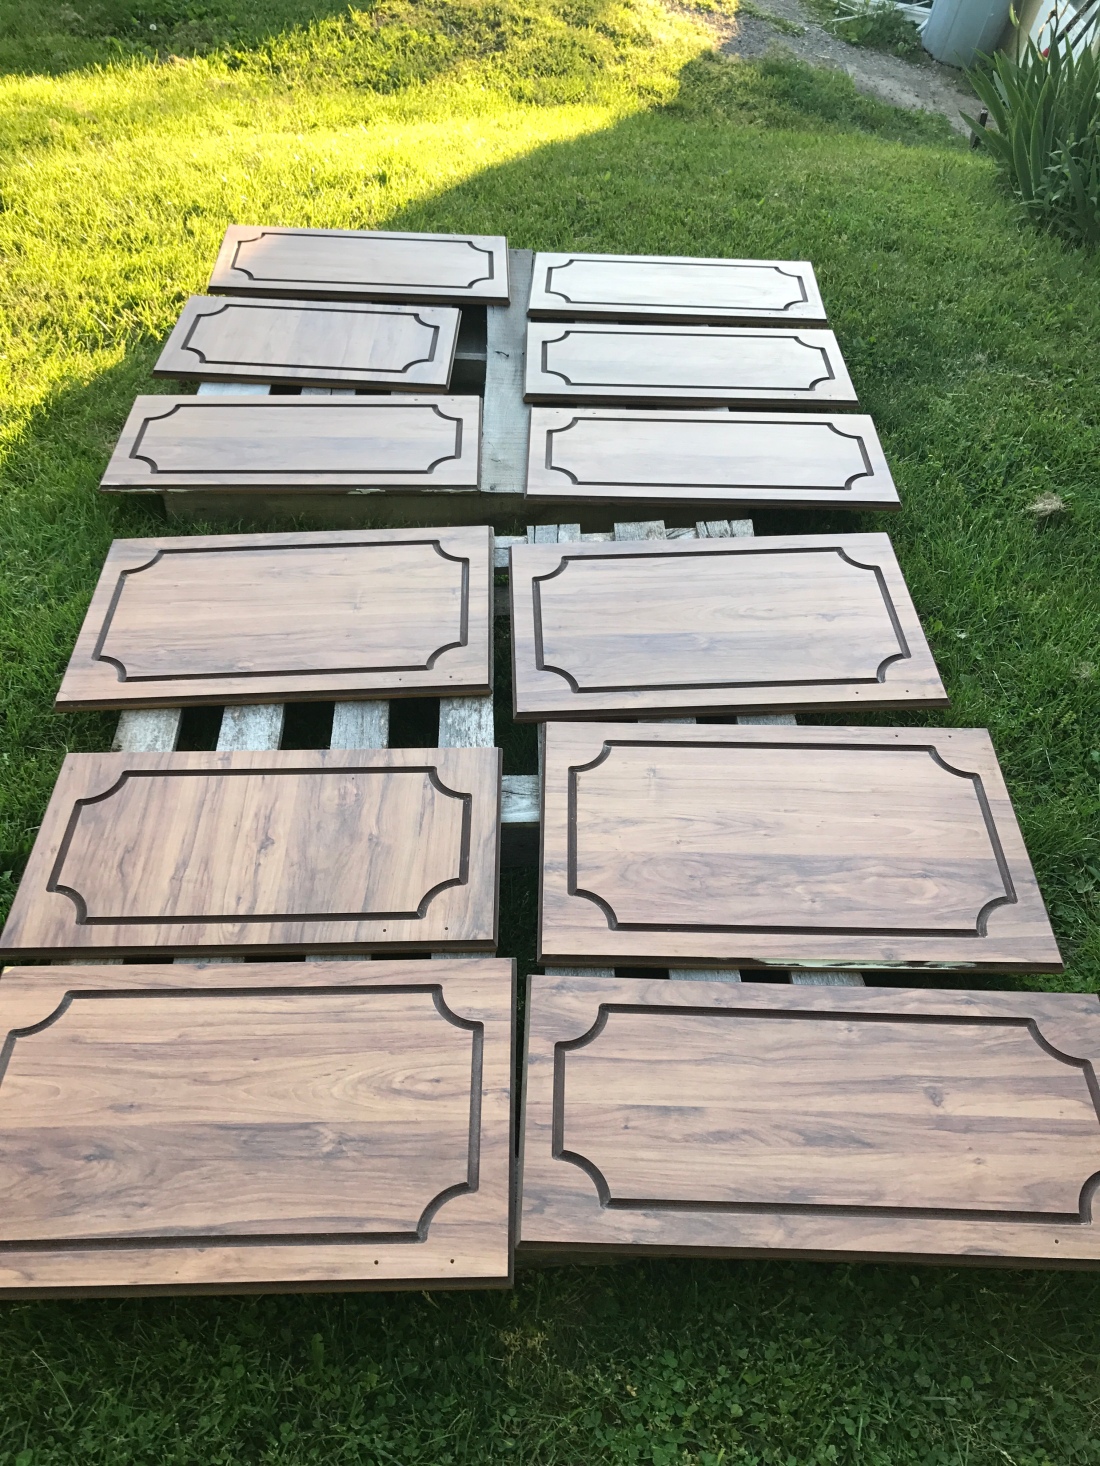
First, I picked out a nice gray paint for the walls. I loved the gray trend and thought this was a good opportunity to break into it. There really weren’t many walls to paint so I stripped the old wall paper off of them and got right to it. The walls looked so fresh! Next, I picked up some paint swatches at Home Depot and chose a nice soft whitish color for the cabinets. I took all the doors off, all the hardware, and began sanding. I sanded some more, then washed everything down and painted. I painted the cabinet boxes in the house and I laid all the doors out in the yard on pallets and paneers them there. I used a brush to brush on the paint. It took about three coats to cover the dark cabinets. I used a paint and primer in one.
 n
n


I purchased new hinges and pulls for the cabinets and drawers. Lesson learned here: make sure you order the correct type of hinge. I had no idea there were so many types of hinges (inset hinges, overlay hinges, etc.) I ordered the wrong ones the first time, and had to exchange them. New hinges also meant drilling new holes for those hinges. This didn’t seem like such a big deal but was a little bit of a pain. Measuring out each hinge on each door, marking the holes and drilling. Then, securing the hinges. This also meant new holes had to be drilled into the cabinet boxes in the kitchen. Thankful for my trusty tape measure, I measured and marked the holes, held the cabinet doors up just to be sure they were in the right spot, and drilled them. Then, finally, I mounted the doors. I was thrilled! The kitchen looked so fresh!

A few weeks went by and as I made my coffee every morning before work, I’d admire my paint job in this brighter, better kitchen. I did some rearranging and moved the fridge away from the window. The sun would shine though in the morning and I just loved it! But what about these counter tops? They don’t really go with the rest of the kitchen now. Looking for some ideas, I jumped on Pinterest. I had a friend who sponge painted her counter tops to look like granite (they didn’t look like granite.) I thought there’s got to be some way to update these, and there was. I came across this on Pinterest. I had used Pour On before to make a table so I was familiar with the product. I thought this was the solution to my outdated counters. I told my boyfriend what I was thinking of doing. He hated the idea so much he was ready to go buy new countertops. I told him to let me try it and if it doesn’t turn out, you can buy a new counter top. So, following the instructions from the post, I bought all of the material, taped off my freshly painted cabinets and walls (I know, I should have done the counters first), opened the windows and began spray painting the counter.
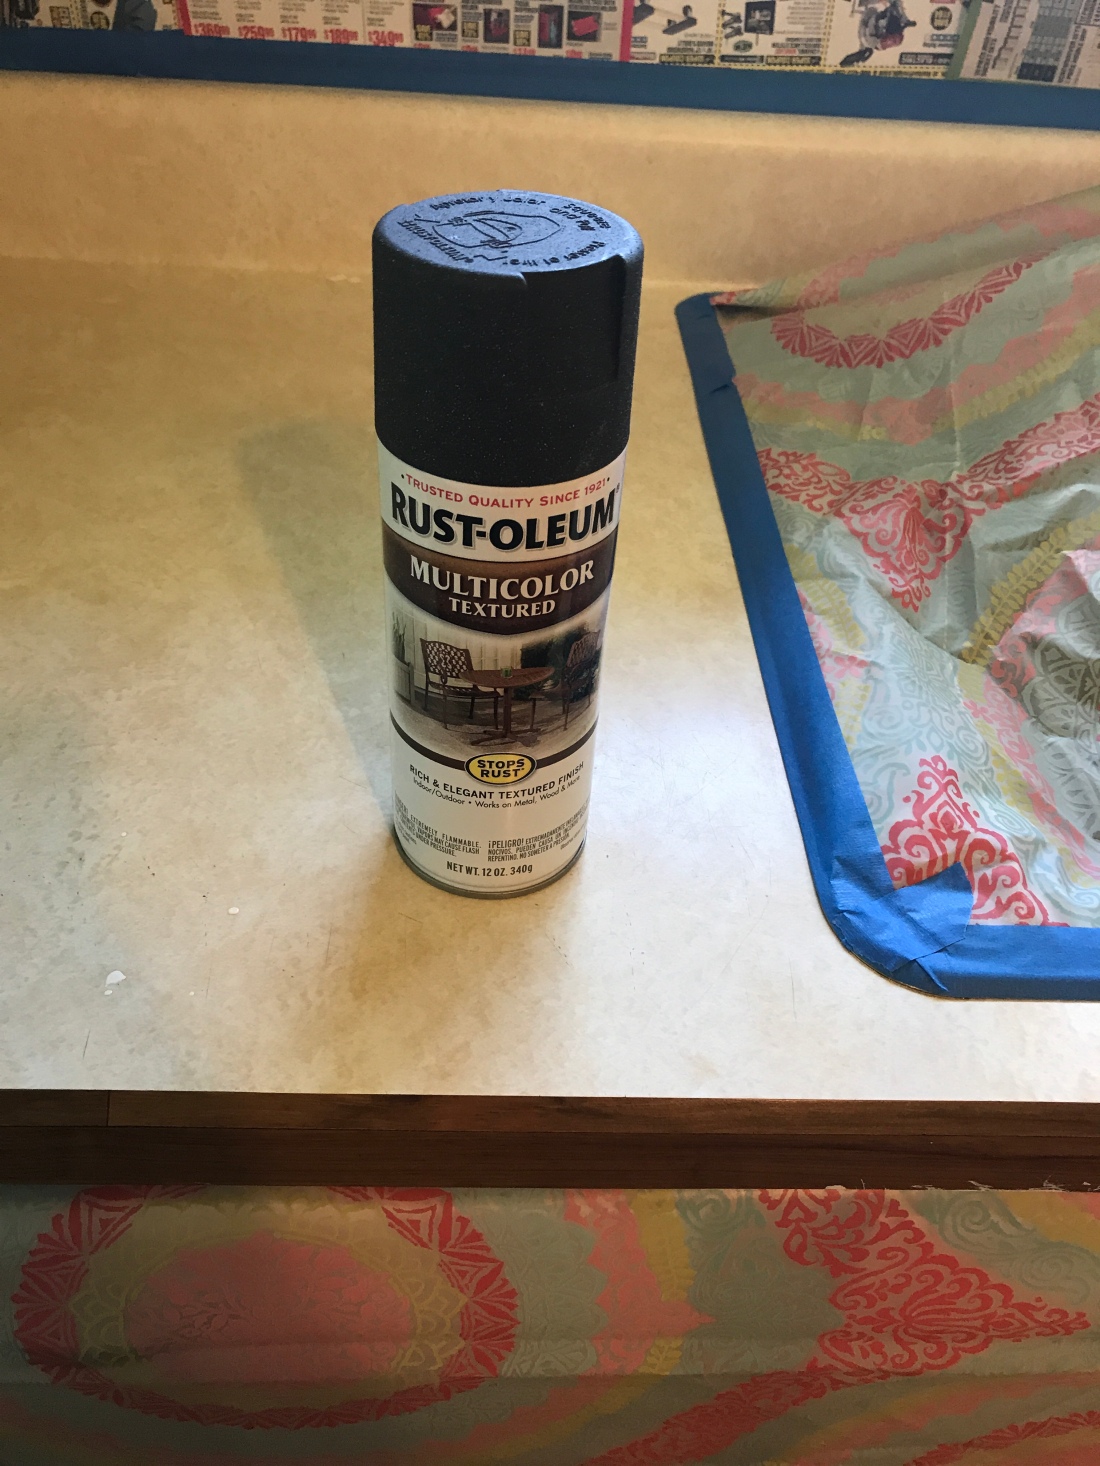


The counter was a white laminate. The spray paint was a dark gray stone finish. It took 6 cans to cover my small countertop area. If I did it again, I’d use a dark primer on the counter, then finish with the spray paint. I was very pleased with how the paint covered and adhered to the laminate though! I was careful to make sure I had plenty of ventilation (fans in windows, etc.) and was mindful when painting so I didn’t get the spray paint everywhere.
Next was the Pour On. I ordered it on Amazon and it wasn’t too pricey. Again, lots of ventilation here. This stuff stinks! This is the only step my boyfriend was interested in helping with. I think because it involved using a torch to get the bubbles out of the pour on once it’s applied. I poured it on and used a foam paint brush to spread it evenly and he followed behind me with the torch. It a as as simple as it sounds.

Now for the hardest part, the waiting. Wait, wait, wait for the Pour On to set. When you think you’ve waited enough, wait one more day. You’re likely putting heavy items on your counter, so you want it to be completely hardened before using.


Obviously after all this, I wanted new floors. My in-laws had just put in new laminate flooring and had some left over. It happened to be gray and matched perfectly! I said I wanted to use it and would need to get a little more to cover the entire area. They came over with the flooring and laid it one night while we weren’t home. They’re pretty great! I was thrilled with it when I saw it. My kitchen felt new, fresh, and updated.


Final thoughts 2 years later? I’m still happy with it. I’m happy I did it, I learned a lot, and it was a fun DIY project. Is it perfect? No. If you want perfect, durable counters, I recommend springing for granite counter tops. We knew we weren’t going to live here forever, so we were okay with a fix to get us (well really just me) by for a few years. I wouldn’t do this in my forever home. I love my kitchen now though and what a huge improvement from what it used to look like.